What is the AeroPress Inverted Method?

AeroPress Inverted Method

The AeroPress coffee maker was conceived by the inventor of the Arobie Flying Ring, Alan Alder, as a reliable way to produce coffee – including out in the open.


You simply needed some coffee grounds, hot water in a flask, and your AeroPress.
The result was great, and consistently reliable. Clean and easy to use, and very portable. Not quite an espresso, but something very close.


As the AeroPress was marketed people really took to it, appreciated its cost-effectiveness and the quality of the coffee it produced. It became popular on location, at home, and at work. Then people began to experiment.


The Inverted Method was born, and the ‘quick & easy’ original method of using the AeroPress was joined by a ‘take your time and brew’ method.


The Inverted Method takes the principles of immersion and steeping with coarser ground coffee to result in different flavour profiles. The room for experimentation with different ‘recipies’ was extended (i.e. using varying amounts of coffee grounds, & water, and changing up the timing to see what different flavours could result).
This is possible by turning the AeroPress on its head, literally! Inverting it!!


The first thing to do for the Inverted Method is to connect the two chambers (so it’s connected as if you were about to push down on the second one).
Make sure they are firmly connected with a good overlap of the cylinders, then flip them over (invert them). They should now be standing on what is normally the top part of the AeroPress.


You haven’t yet put the filter and mesh cap on – don’t, for the moment.
You should now have the tube standing up, into which you can pour the coffee grounds (coarser perhaps, and starting with c11g before you experiment with your quantities).
Please check safety and stability for the next stage, and only progress if you are confident that you will not spill the hot water, that the tubes will not topple, that they are connected well and will not leak, and that you will not be scalded by the hot water.


So, ensuring stability and safety, pour your desired amount of hot (not boiling) water into the tube with the coffee (probably c 100 to 200ml. It depends on how far into the first chamber the second tube is pushed up to).


Then stir really well, remembering that agitation of the coffee grounds with the water is a key part of coffee making.


Now you can leave the coffee steeping, immersed in the water. Perhaps leave for 2 minutes the first time, but this is something to be experimented with along with the coffee and water proportions.


The next part is a little tricky, but best achieved by slightly damping one of the paper filters so it sort of sticks.
Place the dampened filter into the mesh cap. Then screw the mesh cap firmly into the AeroPress.


With your mug in place, quickly and with care, flip the AeroPress over so it’s in a normal position above the mug.


Now breathe.


You’re ready for the normal AeroPress push. Steadily and slowly push down on the AeroPress so that the coffee pours into the mug below, and leaves you with the puck of coffee grounds in the device.


Unscrew the cap, expel the puck of coffee grounds by placing over a bin and pushing the last couple of centimetres. Rinse and wipe the AeroPress and enjoy your coffee made the Inverted way!


You can now add hot water if you prefer a weaker coffee, or milk of your choice if that’s your preference.


The AeroPress is a great device to experiment with. And whether you’re using it the way it was originally designed, or the Inverted Method, you can experiment with grind variations, coffee and water proportions, and timings to hit on a recipe and method that suits your tastes.


Maybe you’ll decide one day to enter an AeroPress Championship – yes, there really are such things!


You can see our store pages if you’ve not yet got an AeroPress, if you need new filters, or if you’d like to try a metal filter.
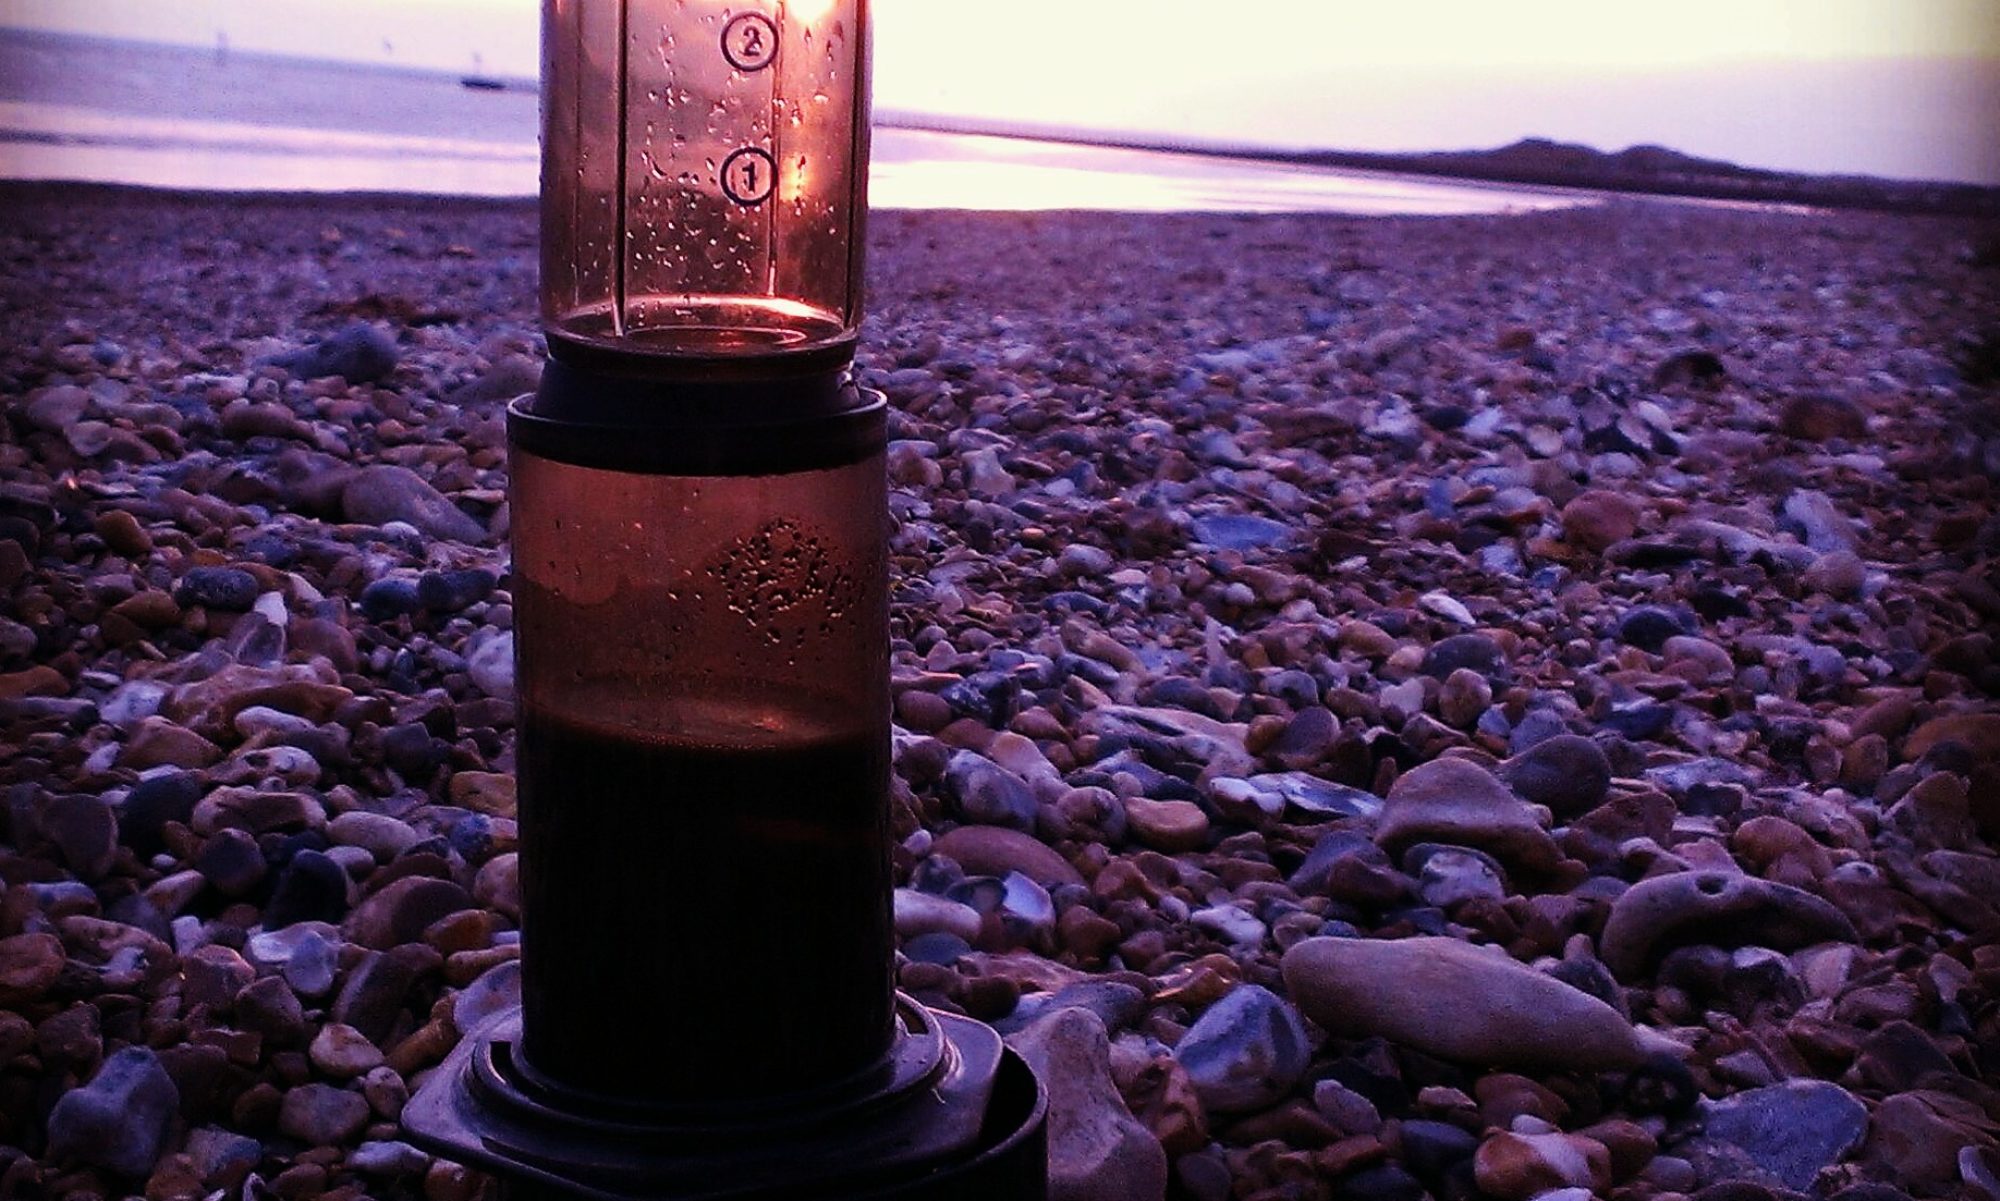
Making coffee with the AeroPress

AeroPress from above with coffee grounds inside

The AeroPress is a great coffee maker and it was designed to make coffee a particular way – but as people have experimented with it there has been a wider range of ways to use the AeroPress. People now vary the time that they let the coffee stand, the grind of coffee that they use, the mix of coffee and water in the AeroPress chamber and whether to use it straight up as it was designed, or to flip it over and make coffee the Inverted way in the AeroPress!

This post is going to focus on the quick and easy way of making coffee that was the original idea – we will follow up on posts with other methods, but not in this one!

The AeroPress was designed for you to be able to make coffee ‘quick and easy’ in literally about 30 seconds once the water is ready.

Simply placing the paper filter in the mesh filter holder and screwing it onto the bottom chamber of the AeroPress is the main preparation. Oh, and placing the bottom chamber over your coffee mug too!

AeroPress was designed to make espresso style coffee – and so placing an AeroPress scoop of coffee grounds (fine ground, but not powdery) puts about 15g of coffee into the device – you can weigh and measure if you’re at home, but if out and about the scoop is a pretty good approximation.

Then simply pour in water (at about 85 degrees celsius) to the number 2 level indicator (as this is a double shot measure).

Next step is to stir for 10 seconds – this mixes the coffee grounds with the water, and ensures that the water is extracting the coffee from the grinds.

Straight away you can put the upper chamber into the lower tube and gently press down for 20 seconds till the plunger gets to the bottom. You may be too keen in your pressure, and this is likely to impede your progress as the device somehow seems to fight against you – a slow, gentle, consistent press seems to give the most effective progress.

That’s it!

Your coffee is now in the cup – in an espresso style measure. You can add water to make an Americano, foamed milk to make a Cappuccino, or use other methods to prepare your drink the way you want it.

The AeroPress is super simple to use and really does produce consistently good results. There are other methods of using the device and we’ll come back to those, but mastering the device for the method it was designed is an essential starting point in our eyes.

Find out more about the AeroPress here.

Which way would be your preferred way to use the amazing AeroPress coffee maker?

AeroPress coffee maker Series 5

The AeroPress is a brilliant coffee maker which can produce consistently good results, with a couple of different options for how you use it.

The classic method is the quickest which is simply..

coffee – water – stir – press.

The AeroPress packaging still says stir for 10 seconds and push for 20 seconds – it really can be that easy to make great coffee. You can watch a video of Artistry’s Sarah demonstrating this method.

Then there’s the inverted method which is a little slower and more intricate, but the favoured method of baristas worldwide.

This involves pouring the ground coffee and the water into an inverted AeroPress, stirring and then letting the coffee brew for a few minutes.

Then adding the filter and mesh cap and quickly turning over to press the coffee through into a mug below.

This allows for lots of experimentation with different grinds on the coffee and different brew timings.

So you can decide if you want a quick well-made coffee that beats instant coffee hands down – or to take more time over the coffee and the experimentation to perfect your own brew technique!

There’s now a Series 5 version of the AeroPress, which has shiny gold lettering and a cloudy brown look to it.

Colours and materials used have changed over the years as the design has been adjusted from the original clear with blue guide marks.

The baby of PourOver makers has a good style

Cafe Stal coffee maker

The Cafe Stal is a lovely little coffee maker and really good value too. It has almost 600ml capacity in the brewing and serving vessel which also features a stainless steel removable pourover filter. The heat resistant glassware is really simple and a delightful compact size. It has an acrylic neck for helping with your serving.

You simply add your ground coffee to the mesh filter which sits in the top section of the pourover vessel. Slowly wet the coffee grounds and let the coffee ‘bloom’ for 30s to 45s, then pour hot water very slowly in spiral or zig-zag motions over the ground coffee for a couple of minutes or so.

The coffee grounds will release their flavour as both aroma while your making the coffee and as the coffee itself which collects in the lower part of the vessel.

Once you’re done, remove the steel mesh, and sit down with a friend to enjoy your coffee – or on your own for a double dose of caffeine! You can later discard the grounds for compost, rinse the steel mesh and the vessel well and it’s ready for use again.

As an introduction to PourOver coffee making this device would serve really well – as it already has a steel mesh filter and is like a tiny version of a Chemex which feels like the granddaddy of pourover makers!

See more about the Café Stal from Rayware here.

Cafe Stal from Rayware
Cafe Stal showing mesh filter and glass chamber

The Hario V60 Ceramic set a PourOver standard

Hario V60 Ceramic Dripper

To be fair, most of our products are favourite in some way or other – we love handbrew coffee techniques and like to keep trying all the different methods we can get our hands on.

One of the simple, relaxing, first ways that we embraced handbrew coffee was with the Hario V60 – it’s a ceramic conical device that sits atop a mug or jug. Into it you place a paper filter (which you can wet to remove any paper taste that you might otherwise detect). Into the paper filter you place ground coffee to a medium coarse grind.

Simply pour a small amount (perhaps 40g) of hot water onto the coffee grounds and let them swell, or ‘bloom’ for half a minute or so. This gives the coffee grounds the chance to wet through and ensures more coffee flavour is extracted.

Then in slow swirls continue pouring water onto the coffee and allow it to drip through to the mug or vessel below – take your time in this and enjoy the process.

You’ll achieve a more delicate flavour of coffee and slow down a little while you’re at it!

V60 from Hariohttp://www.artistrycoffee.co.uk/shop/proddetail.php?prod=D0021 is synonymous with handbrew coffee making and this simple well-designed piece of coffee making kit is a standard – literally setting the standard against which other pour-over devices have to measure up to gain worthy credentials.

The journey gets more serious? ….starting to discover pour-over coffee!

Hario Buono, and V60 Ceramic Dripper from Artistry Coffee

So for many of us coffee is a part of our life whether we think about it or not!

The question do you want a coffee has probably already been said to you or by you today, even if only in your mind to yourself!

However, to start to pay more attention to what your cup of coffee contains can be the beginnings of a journey that gradually increases in intensity.

There was a point when – rather than using drip-filter by accident (i.e. without realising) or french press because it sat there (thinking it was just a cafetiere: which of course it is!) – the idea of hand-brewing coffee became more than a means to an end, it became an enjoyment in itself!

This started with a V60 Ceramic pour-over: a cup-like thing with a conical shape and a hole in the bottom. You place a filter paper within it then add ground coffee and pour hot water over the coffee which then drips through to a mug sitting below.

This is a slow coffee making process to savour: not perhaps the best method to use if you’re in a rush!

But this is where a real enjoyment in coffee making started for me and my wife. The process of thinking about the coffee and what it was doing as you were making it became interesting, and the time taken in the pour-over coffee making started to be a relaxing routine.

Starting with the same ground coffee we were using from the supermarket, we enjoyed “blooming” the coffee by pouring a small amount of hot water for about 15 seconds to let the Coffee grounds swell; then pouring hot water gradually over the coffee for another 2 to 3 minutes whilst seeing gasses from the coffee bubble up a little.

Hario V60 Pour-Over Coffee Maker available from Artistry Coffee
A V60 Pour-Over Coffee Maker
Pour-Over Coffee Making Equipment available from Artistry Coffee
Making Pour-Over Coffee

The aroma from the coffee when making it, as the coffee interacts with the hot water and then drips though, adds to the pleasure – and this is heightened because of the slow process of the pour-over coffee making. We found that the coffee was much more pleasurable as black coffee than we had ever experienced before: which then took us to a new place in coffee appreciation.

Discovering pour-over coffee making was a great find, and we recommend it to all – when you have time to savour the process!

Water Temperature Experiments for Coffee (6): …

Recording Temperature of Poured Water

This series of posts started from a fairly simple question in my head – what is the rate of cooling of water from boiling – to have some sense of what temperature coffee making is conducted at when there are no thermometers to hand! It has turned into a rather more complex investigation than first thought – but has been at least a little fun along the way. Here, were close to the end of my write-ups!

We’ve already covered that when transferring water after boiling from an electric kettle into another vessel such as a Buono kettle (in order to achieve greater accuracy for pour over coffee making) there seems to be about a 3 or 4 degree Celcius loss of temperature straight away.

So this post is about the expectation that as the water is then poured from the Buono onto the coffee grounds themselves there is likely to be another (notable?)drop in temperature.

That was the expectation and indeed has been exactly what I observed in my experiments.

In order to attempt to measure this effect, I rigged up a set-up (imperfect, but trying to get close to something realistic) where I could pour water from the Buono spout directly onto the bulb of the thermometer. That’s the closest I’ve been able to construct to something reasonably meaningful.

I conducted most of my previous efforts over a 10 minute observation window – however the idea of pouring water from a Buono kettle for 10 minutes was never going to be achievable – I did try and control it well, and managed around 5 minutes each time, which I think was a good achievement (also meant my rate of pour should have been similar on each attempt).

Chart of Observed Temperatures (time from Boiling Point)
Top Line (darker) : Observed Temperatures in Electric Kettle
Next Line (mid-tone): After being poured into Buono Kettle
Bottom Line (lightest): Temperatures of the Pour

The temperature within 30 seconds had dropped to 90 degrees Celcius, but took till almost 6 minutes to drop the next 5 degrees – by which point it was almost equal to the observations of the temperatures achieved in the Buono kettle itself(with no pouring).

That line on the chart that resulted did puzzle me at first – although the greater initial drop in temperature made sense, the slower rate of decline in the following minutes than observed in the kettles did seem odd ( I haven’t worked all the way through this yet, but I think one of Newton’s Laws does help – I need to look into that a bit more, and will try and write something in a few days).
What also seemed odd is that the water poured from the Bouno (having been poured in the Bouno from the electric kettle) was at a lower temperature in the earlier moments of observations than the water in the open-top vessels.

Observed Temperatures from Boiling Point
Top Line (darker): Temperatures in Electric Kettle
Next Line (mid-tone): After being poured into Buono Kettle
Bottom Line (lightest): Temperatures of the Pour
Yellow Line: Temperature in open-top container

OK – only for 30 seconds, but that it crossed the line, then crossed back again made me think that this science lark was just far too complicated!

But here could perhaps be the most important thing to understand from these experiments – that the pour itself is where the temperature changes the most (pouring from the kettle used for boiling, into another vessel in the first place, and from the pouring vessel onto the coffee).

And therefore different styles of pour, durations of pour, or methods of dealing with the water will mean that the temperature, in effect, on the coffee is different.

This is where the water is coming into most contact with the air (or perhaps more importantly (scientifically) the much lower ambient temperature) and so is losing the most heat.

So I guess one of my biggest conclusions is that when we’re talking temperature we may or may not be talking the same thing – the temperature of the water can change greatly quite quickly depending on how it is transferred from the boiling vessel to the coffee.

Water that is the same temperature for 2 different coffee making techniques at the starting point could actually be at very different temperatures when hitting the coffee grounds seconds later.

This coffee making really is both an art and a science!!

please note: boiling and hot water can be dangerous if not handled with care!
(despite the haphazardness of some of my approaches above, I did take some care and would suggest anyone else does the same: and children should be accompanied by an adult)

Water Temperature Experiments for Coffee (5): ….

Hot Water onto Coffee Grounds

Interim Conclusions …?

Instead of being one simple set of experiments to while away an afternoon and get the brain cells working – this little exploration has actually turned into a set of experiments and blog notes and pseudo scientific activity that has occupied rather more than the initial expectation!

Where we’ve travelled so far, I think, is that the temperature of the hot water as it hits the coffee could vary perhaps rather a lot – affected by all that can happen between the boiling of the water and the drips hitting the coffee.

What I seem to be able to conclude so far is that if the water remains in the kettle it retains its temperature much better than if poured into another vessel. If this other vessel is closed top (e.g. Buono kettle) the temperature will perhaps drop 3 to 4 degrees on the initial pour from the kettle, then hold at a slower rate of decline than if poured into an open-top vessel (where over a few minutes the temperature difference may easily be 10 to 15 degrees Celcius).

All of that fairly logical (and some would say obvious or a matter of common sense perhaps), but I’ve found it rather interesting to be able to place some (amateur) quantification on what’s going on, and helpful to think through what may be affecting the readings.

But the key issue is perhaps what temperature the water is as it hits the coffee. And for my own normal coffee making at home, this involves first pouring the boiling water from the electric kettle into the Buono, and then pouring from the Buono onto the coffee grounds themselves.

So the idea that there might be a second heat loss as poured from the Buono kettle seems to be a logical expectation, and that’s exactly what we get – but the results did puzzle me at first.

(I’ll write that up next post…..)

please note: boiling and hot water can be dangerous if not handled with care!
(despite the haphazardness of some of my approaches above, I did take some care and would suggest anyone else does the same: and children should be accompanied by an adult)

Water Temperature Experiments for Coffee (4):…

Buono Kettle with Thermometer

I started out looking at the temperature that boiled water reaches when it is left to cool – to think about having some guide for coffee making when just getting on with it rather than trying to measure every element, every time.

I quickly realized that it wasn’t as simple as that, and the water temperature depends on lots of things that can go on from the point of boiling.

So being in semi-scientific mode (a real scientist could probably tear my methods apart), I went off on an exploration of water temperature with some kitchen table experiments.

Having had a fairly simple start – by simply pouring boiling water into a jug and recording temperatures for 10 minutes. I then figured I needed to think about much more:

  1. If the water is held in vessels of different material
  2. If there is a smaller surface area, especially smaller top of the water, from which the water may lose heat.
  3. What happens when the water is not transferred from the water boiler (kettle).
  4. With those, I tried measurements in a ceramic mug rather than plastic jug which sort of covered 1 and 2 above. Nothing much to report there though.

    Measuring the water in the kettle itself was dramatically different (upto 15 degrees Celsius different at the same time since boiling in my observations).

    But still more to think about: The way I usually make coffee is either to pour first into a Buono kettle and then pour onto the coffee (either in one go into an AeroPress or over time as a drip filter). So I needed some other answers

  5. What happens to the water temperature in the Buono kettle?
  6. And perhaps most importantly, what is the temperature of the water as it actually hits the coffee?

To answer question 4 was relatively simple – simply pour the water straight from the kettle into the Buono and take the temperature readings from there. Answering 5 is a lot more complicated (that’s for next time).

The observations showed that there’s a cooling that goes very quickly, reducing the temperature by around 3 or 4 degrees Celcius, when the water is first poured into the Buono vessel – and that this temperature difference is then roughly maintained for the duration of the observations.

Darker line: observed temperature in boiling device (electric kettle), Lighter line: temperature in Buono Kettle (poured into from electric kettle)

The observed temperatures from the Bouno kettle is the lower (lighter) line on the chart and you can see it approximately holds the relationship with the line above (the observed temperatures from the boiling kettle).

So this is logical, and in line with my first thoughts – that the initial pour into another vessel cools the water by a few degrees from boiling point (whether it be pouring into the plastic jug, the ceramic mug, or the Buono kettle). But the Buono clearly holds the temperature in slower rate of decine than an open topped vessel (this is science of some sort, but not really rocket science! Or perhaps it is!!!).

So I feel that this has all been helpful in coming to some greater understanding of what happens to the temperature of the boiled water, before it is poured onto coffee – but doesn’t get us to the answer of what is happening as the hot water it hits the coffee grounds (so that will be looked at next time….).

please note: boiling and hot water can be dangerous if not handled with care!
(despite the haphazardness of some of my approaches above, I did take some care and would suggest anyone else does the same: and children should be accompanied by an adult)

Water Temperature Experiments for Coffee (3):…

Kettle

From my initial inquisitiveness about what temperature is reached when you leave boiled water standing, a whole lot of other questions gathered. The reason for the initial inquisitiveness was about making good coffee and having some idea of what temperature the water might be at when there is no thermometer to hand: because the taste and characteristics of the coffee are affected by the temperature of the water.

From in initial set of observations and thoughts, I had a need to try some different scenarios to explore whether all the things that I thought might affect the rate of cooling had any meaningful effect.

Actually on my first modifications, I didn’t really get any very different results from pouring the water into a ceramic mug to cool rather than the plastic jug. I guess if my observations were more precise there might have been a small discernible difference, but obviously not big enough to show up for me.

However, measuring the temperature of the water in the vessel where it was boiled (electric kettle in my kitchen experiments) made a big difference – seemingly in the rate of cooling and in the temperatures reached in my 10 minutes of recording temperatures each time.

Not really surprising, but I’m attributing this (perhaps rather rashly, but it seems logical) to the cooling on the water from the pour from the kettle to the jug (or mug), as well as to the fact that the tapered shape of the (at least my) kettle exposes less water directly to the air.

TemperatureAtTimeSinceBoilingPoint_ElectricKettle

Lilac line represents observed temperatures of water in kettle at time (mins:secs) since water boiled.

Rather than getting to c 95 degrees Celcius within the first 15 seconds, that temperature wasn’t reached until 2 and a half minutes. And the 90 degrees wasn’t breached until after 5 minutes of cooling, rather than approximately 60 seconds in the open-top experiments as I’ll now call the first set!

It took over three times as long for the water to cool to c85 degrees Celcius: 7 and a half minutes rather than approx 2minutes 30 in the open-top ones. The rate of cooling also seemed fairly steady in these Kettle experiments rather than changing (slowing down) in the open-top experiments.

TemperatureAtTimeSinceBoilingPoint_OpenContainerVsKettle

Lilac line represents observed temperatures of water in kettle, yellow line for water in open-top container.

This means that if using a rule of thumb as to what temperature the water is at some time after boiling, there could be some great differences depending on where your water is (in relation to where it boiled).

More to come – as we still haven’t got to an answer that is practical ……

please note: boiling and hot water can be dangerous if not handled with care!
(despite the haphazardness of some of my approaches above, I did take some care and would suggest anyone else does the same: and children should be accompanied by an adult)