Water Temperature Experiments for Coffee (4):…

Buono Kettle with Thermometer

I started out looking at the temperature that boiled water reaches when it is left to cool – to think about having some guide for coffee making when just getting on with it rather than trying to measure every element, every time.

I quickly realized that it wasn’t as simple as that, and the water temperature depends on lots of things that can go on from the point of boiling.

So being in semi-scientific mode (a real scientist could probably tear my methods apart), I went off on an exploration of water temperature with some kitchen table experiments.

Having had a fairly simple start – by simply pouring boiling water into a jug and recording temperatures for 10 minutes. I then figured I needed to think about much more:

  1. If the water is held in vessels of different material
  2. If there is a smaller surface area, especially smaller top of the water, from which the water may lose heat.
  3. What happens when the water is not transferred from the water boiler (kettle).
  4. With those, I tried measurements in a ceramic mug rather than plastic jug which sort of covered 1 and 2 above. Nothing much to report there though.

    Measuring the water in the kettle itself was dramatically different (upto 15 degrees Celsius different at the same time since boiling in my observations).

    But still more to think about: The way I usually make coffee is either to pour first into a Buono kettle and then pour onto the coffee (either in one go into an AeroPress or over time as a drip filter). So I needed some other answers

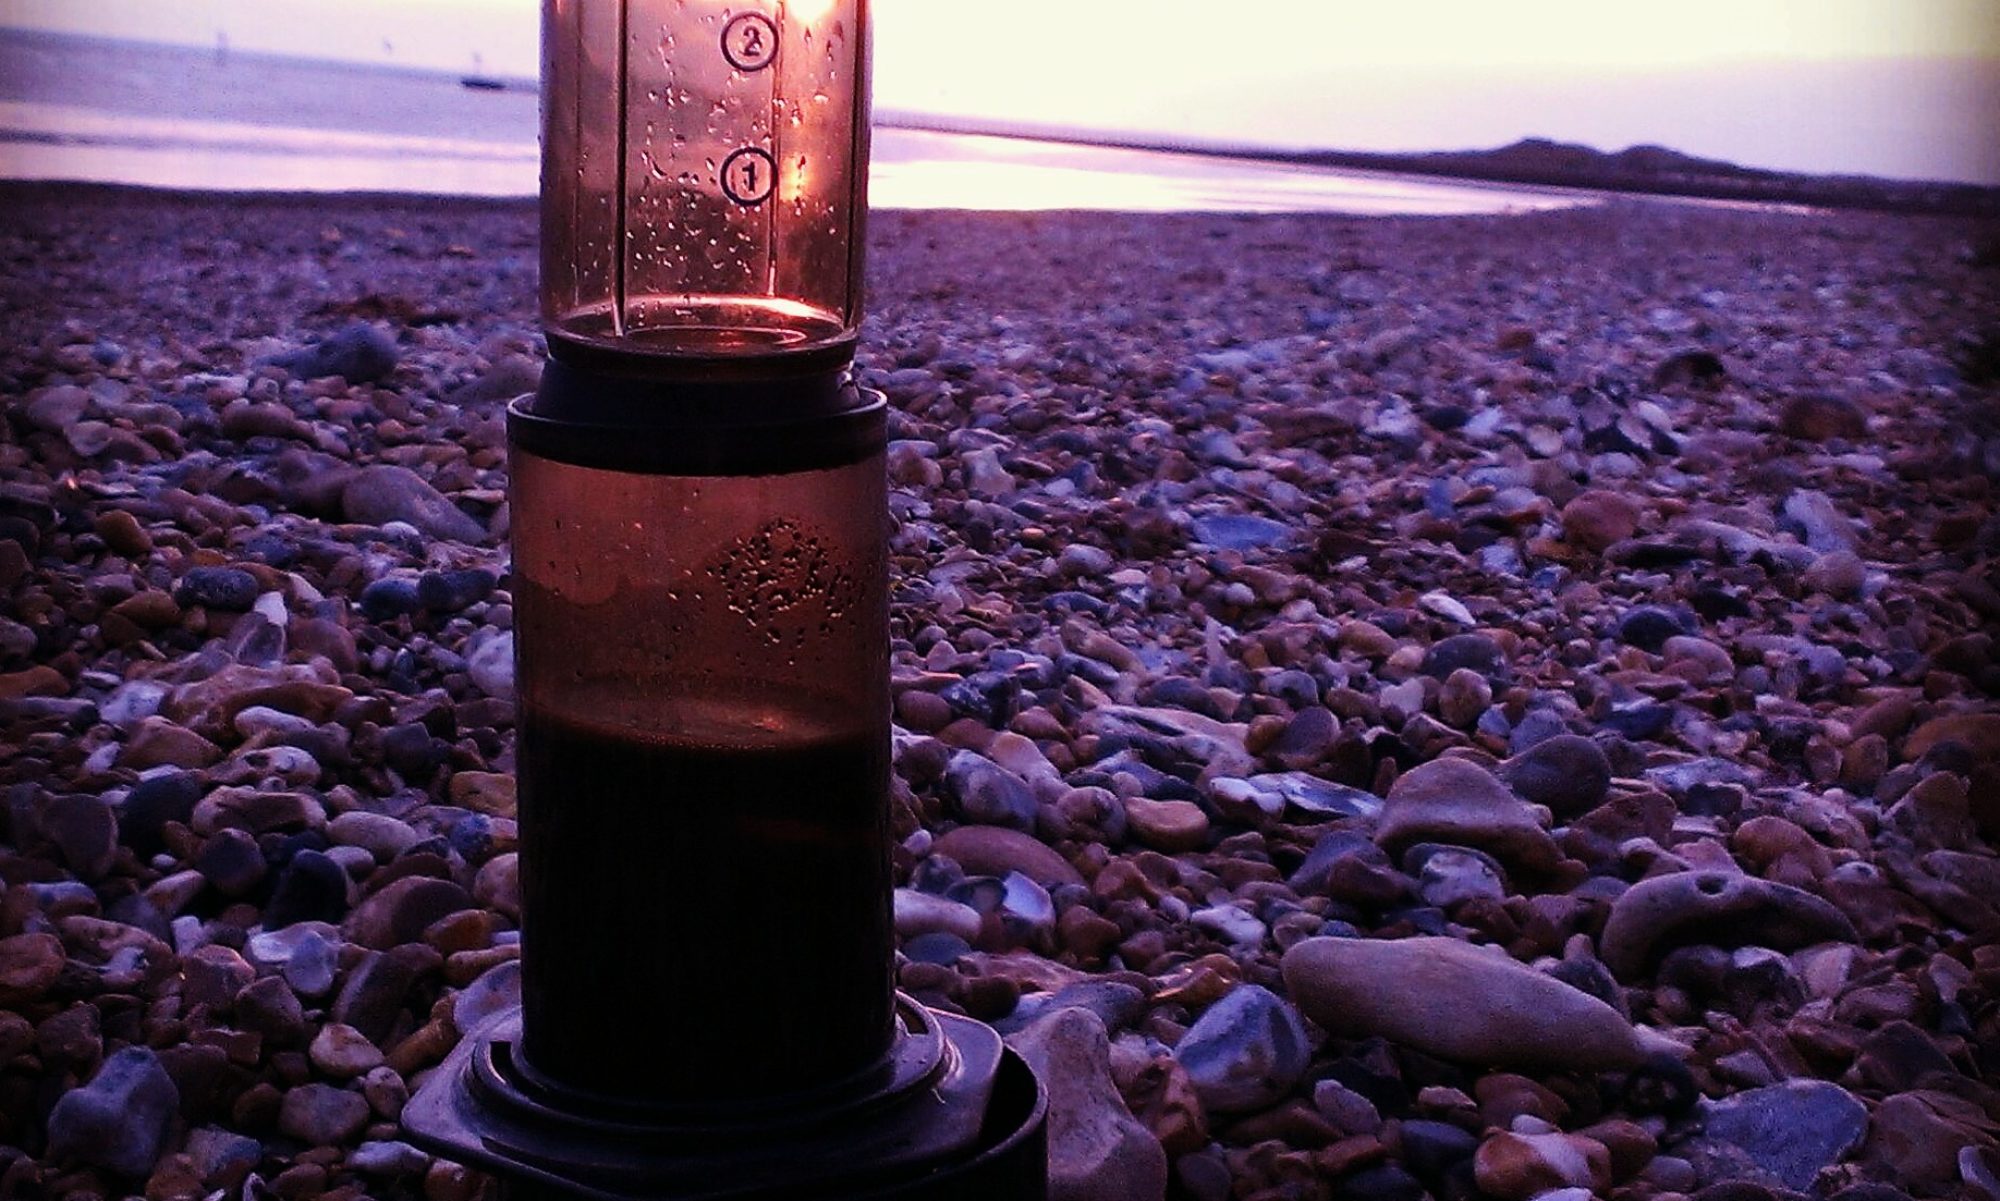
  5. What happens to the water temperature in the Buono kettle?
  6. And perhaps most importantly, what is the temperature of the water as it actually hits the coffee?

To answer question 4 was relatively simple – simply pour the water straight from the kettle into the Buono and take the temperature readings from there. Answering 5 is a lot more complicated (that’s for next time).

The observations showed that there’s a cooling that goes very quickly, reducing the temperature by around 3 or 4 degrees Celcius, when the water is first poured into the Buono vessel – and that this temperature difference is then roughly maintained for the duration of the observations.

Darker line: observed temperature in boiling device (electric kettle), Lighter line: temperature in Buono Kettle (poured into from electric kettle)

The observed temperatures from the Bouno kettle is the lower (lighter) line on the chart and you can see it approximately holds the relationship with the line above (the observed temperatures from the boiling kettle).

So this is logical, and in line with my first thoughts – that the initial pour into another vessel cools the water by a few degrees from boiling point (whether it be pouring into the plastic jug, the ceramic mug, or the Buono kettle). But the Buono clearly holds the temperature in slower rate of decine than an open topped vessel (this is science of some sort, but not really rocket science! Or perhaps it is!!!).

So I feel that this has all been helpful in coming to some greater understanding of what happens to the temperature of the boiled water, before it is poured onto coffee – but doesn’t get us to the answer of what is happening as the hot water it hits the coffee grounds (so that will be looked at next time….).

please note: boiling and hot water can be dangerous if not handled with care!
(despite the haphazardness of some of my approaches above, I did take some care and would suggest anyone else does the same: and children should be accompanied by an adult)

Water Temperature Experiments for Coffee (3):…

Kettle

From my initial inquisitiveness about what temperature is reached when you leave boiled water standing, a whole lot of other questions gathered. The reason for the initial inquisitiveness was about making good coffee and having some idea of what temperature the water might be at when there is no thermometer to hand: because the taste and characteristics of the coffee are affected by the temperature of the water.

From in initial set of observations and thoughts, I had a need to try some different scenarios to explore whether all the things that I thought might affect the rate of cooling had any meaningful effect.

Actually on my first modifications, I didn’t really get any very different results from pouring the water into a ceramic mug to cool rather than the plastic jug. I guess if my observations were more precise there might have been a small discernible difference, but obviously not big enough to show up for me.

However, measuring the temperature of the water in the vessel where it was boiled (electric kettle in my kitchen experiments) made a big difference – seemingly in the rate of cooling and in the temperatures reached in my 10 minutes of recording temperatures each time.

Not really surprising, but I’m attributing this (perhaps rather rashly, but it seems logical) to the cooling on the water from the pour from the kettle to the jug (or mug), as well as to the fact that the tapered shape of the (at least my) kettle exposes less water directly to the air.

TemperatureAtTimeSinceBoilingPoint_ElectricKettle

Lilac line represents observed temperatures of water in kettle at time (mins:secs) since water boiled.

Rather than getting to c 95 degrees Celcius within the first 15 seconds, that temperature wasn’t reached until 2 and a half minutes. And the 90 degrees wasn’t breached until after 5 minutes of cooling, rather than approximately 60 seconds in the open-top experiments as I’ll now call the first set!

It took over three times as long for the water to cool to c85 degrees Celcius: 7 and a half minutes rather than approx 2minutes 30 in the open-top ones. The rate of cooling also seemed fairly steady in these Kettle experiments rather than changing (slowing down) in the open-top experiments.

TemperatureAtTimeSinceBoilingPoint_OpenContainerVsKettle

Lilac line represents observed temperatures of water in kettle, yellow line for water in open-top container.

This means that if using a rule of thumb as to what temperature the water is at some time after boiling, there could be some great differences depending on where your water is (in relation to where it boiled).

More to come – as we still haven’t got to an answer that is practical ……

please note: boiling and hot water can be dangerous if not handled with care!
(despite the haphazardness of some of my approaches above, I did take some care and would suggest anyone else does the same: and children should be accompanied by an adult)

Water Temperature Experiments for Coffee (2):

Jam Thermometer

So thinking of my first experiments – consistent as they were (within their own world of haphazardness) – I wasn’t really satisfied that I’d ended up with a measurement of the right thing. It was informative and revealing, but what about:

  • – The fact that I had done my observations at room temperature (the rate of cooling would have been different if the temperature were much lower or much higher).
  • – The fact that the vessel was made of plastic (of course the ability of the vessel to conduct heat will have an impact)
  • – The vessel was unheated on the first observation, but would have warmed up a little on later experiments (so slowing the rate of cooling?)
  • – The size of the vessel – surface area – probably has an impact on the speed of cooling, and especially, I’m guessing, the surface area of the top of the water.
  • – The fact that I had poured water into an open topped vessel of itself was likely to be important – what of the water that had remained in the kettle,
  • – What if I had poured the water into another contained and covered vessel? (such as a Bouno pouring kettle)
  • – And after all of that, it’s the temperature at which the water actually hits the coffee grounds that matters – so how to measure that?? And could this be particularly important if the rate of cooling on the pour is actually faster than the rate of cooling when water is standing.

I decided to repeat my experiments with some variations –to take account of what I thought would be the most important aspects:

  1. Pour water into a ceramic mug – different material, smaller surface area, especially smaller top of the water.
  2. Measure the temperature in the water boiler (kettle used to boil the water). Without lid (practicality rather than best experiment).
  3. Measure the temperature in a Buono kettle (having been poured from another kettle which boiled the water). With lid replaced between readings.
  4. Measure the temperature of a Buono kettle with lid being slowly poured directly onto the bulb of the thermometer – the closest I can easily get to measuring the water as it hits the coffee.

Inadequacies in all of the above in the way that they are conducted, what they are demonstrating, and whether they are measuring anything near reality – but interesting and a bit of fun. And some conclusions possible, I think!

More to come in future days -including the realisation that Newton had a law for ( some of) this……


please note: boiling and hot water can be dangerous if not handled with care!
(despite the haphazardness of some of my approaches above, I did take some care and would suggest anyone else does the same: and children should be accompanied by an adult)

Water Temperature Experiments for Coffee (1):

Water Temperature Experiments

Water cools from boiling, we all know this – but just how quickly?

It’s a question that puzzled me, and I could find no quick answer on my google searches that met my needs – so what better than to go back into a science lab and do some real-life experiments!
Well, a kitchen. And a set of semi-controlled slightly made up conditions as I went along and made my observations. I’m sure a real scientist would be able to tear my kitchen table methods to shreds. But I thought doing these would at least point me in the right direction.

One of the first things I learned about coffee was “don’t pour boiling water onto the coffee” and as I have come to learn more I’ve repeatedly heard temperature being held up as one of the great variables affecting the coffee.

In geeky mode then, thermometer at the ready every time you make coffee and all is well I suppose?? But what if a coffee needs to be made quickly, or you just don’t have a thermometer to hand?? – is there a rule of thumb for how long you let the water rest after the kettle has boiled?

So my experiments began.

I might add that the first thing I found on the internet after I completed my experiments was a paper on how quickly water cools after boiling – but as I’d gone to the effort, I will document my findings here anyway!

I started by getting a jam thermometer (borrowed from my mother-in-law) as – fairly obvious I know – a regular one would not cope with the high temperatures I needed to record. And as with most things, although the idea of such an experiment had been rumbling around my brain for some time, the decision to actually progress with this had a fairly random timing. So rather than not do it, best get hold of what would be available.

The first set of observations I made was also using what else was easily available, a plastic jug. Probably not the material I would have chosen if I had actually thought properly about it!
I took observations every 15 or 30 seconds – in part depending what else was going on in the kitchen (but never leaving a gap of more than 30 seconds on these).

During the first time I decided that 10 minutes was about the right duration to keep going (a mix of what temperature had been reached and how long it would take to do all this: I realised early on that I would have to repeat the experiment so that I knew whether it was just a fluke).

My random nature in proceeding with these experiments meant that I hadn’t created a lovely observations table to record my readings – but was just scribbling the findings on some cut-offs of paper.

I also realised that the nature of the thermometer that I was using meant that depending on the angle of my head to the instrument I could come up with 1 of 3 readings whether my head was above, straight-on, or below the mercury (actually a coloured liquid: don’t know what they actually put in thermometers!). I think that’s most of my confessions out of the way on this exercise!

So a little haphazard, but off I ventured with this activity – trying to ensure I was learning quickly so as not to invalidate my experiments too much!!

At first I was a little puzzled that I couldn’t get a reading of 100 degrees Celsius from the water in the jug, no matter how quickly I poured and measured. I attributed this initially to the fact that the mercury (not really mercury, but we don’t know what it is) took time to get to the temperature – but later realised that the act of pouring the water would be cooling it down too. Another realisation (again obvious, but best to think about it at some point: was that the ambient temperature could affect the rate of cooling – I was doing my experiments in a room temperature environment (somewhere close to 20 degrees Celsius).

I did organise myself a little better as I went along. and transferred my readings to an excel spreadsheet before I had taken too many. So as not to get confused, to have a proper saved record, and to be able to perform some calculations on them and chart them.

So by the end of the experiments some sense of order had been enforced.

Headlines were: that the water was at c 95 degrees Celcius within the first 15 seconds, that it had dropped to under 90 degrees by around a minute, and 85 degrees by between 2 minutes 15 to 2minutes 30. And that the rate of cooling was quickest at first, and then slowed.

The average of 4 observations is charted in the attached diagram (observed temperature – in degrees Celsius – on the vertical, and time since boiling – in mins:secs – on the horizontal).

I repeated the observations about 3 times- and was surprised at how consistent my results were (to say it wasn’t exactly lab conditions, that my eye level could have thrown it, and that the starting temperature of the vessel would have been different between the first time and subsequent times – when it would have been warmer)

Thinking about what might have affected things did lead me to conduct some slightly modified versions to explore different situations too. But I was pleased with my initial findings – charted below.

Temperature vs Time
The Time Taken for boiling water poured into a jug to cool.

More to come……

please note: boiling and hot water can be dangerous if not handled with care!
(despite the haphazardness of some of my approaches above, I did take some care and would suggest anyone else does the same: and children should be accompanied by an adult)

Gradually Piecing Coffee Learning Together…..

Coffee Making with Artistry

Through accident, experiment, and impediment it’s possible to gradually realise that there are better ways to make better coffee.

Realising not to pour on absolutely boiling water, realising that there are a wide variety of coffees available, realising that there are ways to become more consistent or methodical in your approach to coffee making, and that there is a choice of many ways of making coffee.

Piecing all this together brings an awareness that coffee making can be a bit of an art that you can enjoy for itself aswell as for the caffeine kick!

In fact each part can be made into a bit of an art. There’s the choosing of the coffee to buy, the decision about which way (brew method) to make your coffee, the process itself including the grinding of the beans, the pouring of the water, the timing of the process, and the method of delivery (which can be experimented with and varied to produce discernible, and perhaps sometimes not so discernible results), and of course the sitting down and savouring the result.

Basically you can take your coffee making as seriously as you want. If you know what you like and you know how to make it and don’t want to think any further than that, then fair enough. But if you want to you can explore the coffee and the coffee making process and even turn it into a new hobby! You can explore different tastes and simply enjoy learning the various processes that can be applied to the coffee to vary the flavour.

At Artistry Coffee we became fascinated by the old and new techniques that there are to create hand-brewed coffee: and have enjoyed exploring and collecting together some great products to make coffee with.

My main basic learning came about in the last decade through blundering around with various cafetieres and a simple one-cup drip filter maker. Gradually coming to some of the realisations above.

In the last couple of years I have:
– discovered the art of the pour-over method and greatly enjoyed taking time over the process of pouring and making the coffee
– discovered hand grinding, and explored various grind settings that affect the interaction of the water and the coffee grounds.
– and discovered that there really is so much to explore about coffee making. We have favoured exploring hand brewing options rather than anything with machines: as for us it feels closer to the coffee.
Experiencing the AeroPress coffee maker as a way to quickly make a cup of coffee that packs a punch was great, and it still remains a favourite.
As well as the ease and simplicity, and yes cleverness, of the Clever Dripper which has an innovative valve shut-off system to help serve the coffee.

I don’t think you ever end the learning about coffee beans and the growing methods though.

Enjoy making coffee, whether in straightforward ‘just get me the caffeine’ mode, or in ‘fascinated, artistic, exploration’ mode.

Coffee for Mum

 This cream jug in 250ml size is perfect to help you serve your coffee…

– Check this out on Pinterest.http://pinterest.com/pin/492510909225723701/?s=3&m=wordpress

Red-Heart-Jug1

. So easy to make with this….

– Check this out on Pinterest.http://pinterest.com/pin/492510909225723701

2015-03-02 19.29.58

 Hearts as handlesH. A lovely serving….

– Check this out on Pinterest. http://pinterest.com/pin/492510909225723306

woodenhearttrayL

 Hario design in the V60 series. The DripIn filter maker…

– Check this out on Pinterest. http://pinterest.com/pin/492510909225723414

hariodripinfilter3

Find these and more Mother’s Day ideas at  https://www.pinterest.com/ArtistryCoffee/uk-mothers-day-2015-march-15/

and visit artistrycoffee.co.uk

One scoop or two…..

A scoop to measure coffee

Of course soon enough in time on the coffee journey you come across a cafetiere to make coffee with (or French Press as some like to call it). This is a simple yet clever device, with the mesh disc to push the ground coffee down in the coffee maker and keep them (mainly) separate from the coffee that will be drunk.

There are lots of things that can be said about making coffee this way – and I’m sure we’ll come to them one day – but the biggest thing that puzzled me was how much coffee to use. And it’s not like I did the sensible thing and work it out then remember it: so every time I make coffee this way was like starting afresh.

It actually gets complicated by the fact that making coffee in different homes, with different coffees, and different size cafetieres means that even if you get the amount of coffee right one time, the next coffee you make with a different blend may need a different amount. And what about the 1 cup vs the 4 cup, 6 cup, 8 cup vessels?

How can anyone ever get it right?

And how do you judge the right amount of water each time?

In fact here we are at the heart of the brew recipe: a phrase which at first (for coffee) seems bizarre, yet is increasingly used by coffee fans to record how they made their latest coffee.

In simple terms something like – 2 scoops of ground coffee to one mug of water. [In reality a brew recipe will potentially record all sorts of things, but that’s for another time].

At its simplest remembering the proportion of water and ground coffee that you use is a first key step to getting a consistent approach to coffee making. And a first simple brew recipe.

A lot of it is about proportions – so you can then double the numbers for 2 mugs, quadruple for 4 etc. Maybe a bit more complex than that, but not far off.

If you use the same type of coffee all the time, you will no doubt hit on proportions of coffee and water that you prefer: and it is worth experimenting with this as it can affect the enjoyment you get from your mug. Also try with different lengths of time after the kettle has boiled, as the temperature of the water can be an important factor. And different timing before you push the plunger down.
Write down what makes the best cup for you, along with the blend of coffee that you made it with.

Once you start weighing the coffee for more precision you know you’re taking it seriously !

So learning the cafetiere is not quite as complex as learning a musical instrument, but maybe a bit similar – you can pick it up and get some coffee out of it: but if you play it well, the notes the coffee delivers will change and become more melodic perhaps. And just like music, I’ve hinted that timing is important too: but that’s also for another time!

There’s something in the water….

Water pour onto coffee

More and more I realize that the starting point for things really matters – so for coffee the water and the beans are the prime ingredients. So it’s obvious really that what you do with each of these is fairly key to what ends up in your cup. It’s perhaps one of the first things that you learn about coffee that it’s not good to use absolutely boiling water as you make the cup.

Even with instant coffee this can be pretty early learning. The fizz of the granules as the water boils them is interesting but not a prequel to a good cup of coffee. So the water and what you do with it in making the coffee is important.

The water temperature should probably be a good 5 to 10 degrees off boiling point, and for some coffee making even lower than this. I don’t know the full science behind this, but it does make some common sense that the water can be too hot and spoil the grounds (or the instant). So a little patience after the kettle boils can only be a good thing.

I do want to do some experiments with what happens to water after it has boiled: partly for fun, and partly jut to be inquisitive.

It’s also true (OK perhaps not strictly speaking, but certainly practically speaking) that water does not equal water does not equal water.

We all know the stories of washing your hair in hard and soft water areas – or the dishes, or clothes – and perhaps the fact that water can taste different on holiday or in different locations. So it’s got to be no surprise that there are characteristics to the water that we use, and these affect the taste of the water and therefore the effect that the water has on the coffee that is made.

There are even discussions amongst the most eloquent of the coffee aficionados about which spring water is the best one to use to make your coffee.

That may be a bit extreme for most people, but it highlights the point that the water does affect the end result. So water filters may not be a bad idea, or at least being aware that water matters and at least keeping an eye on not scalding the coffee by being too eager after the kettle has boiled.

How I wished I’d paid more attention….

drip filter for one

My weekend coffees in the noughties facilitated then by supermarket bought ground coffee – of such better quality than my weekday ones facilitated by instant coffee – were also made to a better method than I realised at the time.

Actually it was a fairly simple and very plasticy mechanism, but one where hot water dropped slowly through a plastic container with holes in it onto the ground coffee below, and then through a mesh into the cup at the bottom. So even though I never described it as such this was genuinely a Drip Filter coffee which gave a good chance of getting the best out of the coffee that I had bought.

Oh how I now wish I had paid a little more attention – attention to the coffee I bought, the different blends I tried, the way the device made the coffee. Had I done that I might have progressed through the coffee journey more quickly, and appreciated the views along the way a bit more too.

Coffee this way was surprisingly straightforward to make – it kind of made itself while getting breakfast ready, or seeing what the kids were getting upto. Pop the grounds in, pour the water into the top container, put the lid on – then pick up the coffee in a couple of minutes. The little device still sees the light of day occasionally!

Easy for a busy Saturday morning before taking our youngest son to music school. Or now and again with the luxury of breakfast in bed on Sunday before heading off to church.

At the time the fact that the coffee tasted better than during the week seemed good enough.

Only more recently have I really appreciated how much more it’s possible to learn about coffee – and realised that if you’re interested enough you may never run out of things to learn – and that its a bit like wine: the more you know, the more you discern, the more you appreciate, the more you realise that there is still more to learn.

So journey fast or journey slowly, journey a short way or a long way – but enjoy your coffee journey.

How many types of coffee are there……?

coffee cup

As the coffee journey continued from that very naive early years experience of mainly instant coffee – when freeze dried Gold Blend was posh! – there came a realisation that coffee came in more than just 3 or 4 options.

I suppose that I ought to have known more – because my foreign relatives in my fathers homeland of Denmark used to have a very different kind of coffee than I’d ever experienced elsewhere. Looking back I now know that it was properly brewed filter coffee – but wayback then it was just strong and different.

Eventually progressing to ground coffee at weekends – maInly using a 1 cup cafetiere – there was now a bigger task of making sure we always had some available. And so comes the task of buying coffee more seriously (certainly trying a bit harder than just picking up the best value jar from whichever supermarket we happened to be in).

So where do you start when essentially youre considering a new product that you have very little experience of ? Start with the colours, or strength numbers, or the price, or the origin? [That’s an official coffee word now – just means what you think it should …. where does it come from?!]

I dont thinknthat there’s a right and a wrong on this. Even starting with the colours can be sensible – cause it’s more likely that you’ll remember what you had next time you’re buying! The important thing is maybe just that – remember what you try and remember what you like. Maybe take some notes about what you’ve tried and what you liked, and why.

If you do the remembering, you’ll journey on in coffee terms much more quickly and generate an appreciation for and knowledge of coffee perhaps far more speedily than being directed by someone else at what you should like and how you should like it.

Experiencing the journey of discovery of coffee is part of the joy. There’s no shame in being on a learning curve but plenty of interest and fun in  the exploration!

There are so many coffees out there, and so much to discover!